
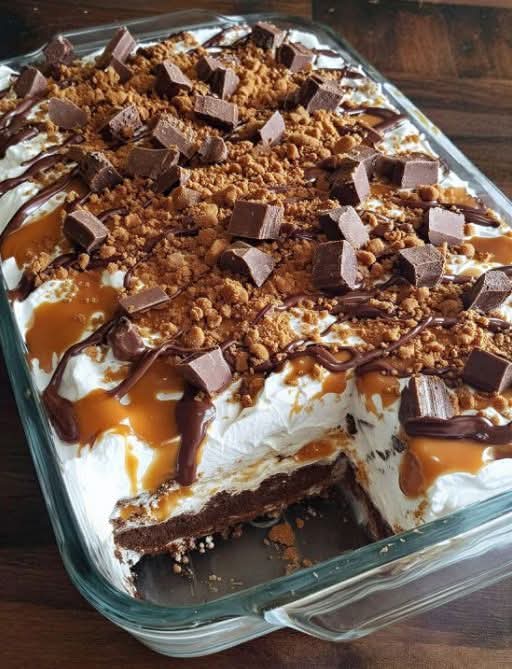
This easy, no-bake “Slice of Heaven” Cake is pure dessert bliss! Layers of graham cracker crust, creamy cheesecake filling, pudding, and whipped topping create a light, luscious, and crowd-pleasing treat. The perfect make-ahead dessert for any occasion!
Close your eyes and imagine the most heavenly dessert. Not a fussy, towering layer cake, but a cool, creamy, dreamy slice of something that feels both indulgent and light as a cloud. A dessert where every layer—from the crunchy, buttery base to the rich, creamy middle to the fluffy, pillowy top—is a perfect surprise. This is the magic of A Slice of Heaven Cake. It’s a dessert that whispers promises of effortless elegance and delivers a symphony of textures and flavors with every single bite.
This iconic dessert, known by many names (Heavenly Delight, Angel Pie, No-Bake Cheesecake Delight), is a cornerstone of potlucks, church suppers, and family gatherings for a reason. It requires zero baking, comes together with simple ingredients, and can be made days in advance, making it the ultimate stress-free, crowd-pleasing dessert. It’s the kind of recipe that turns a novice into a dessert hero and has everyone asking, “What’s in this? It’s heavenly!”
Whether you need a stunning finish to a summer barbecue, a guaranteed hit for a holiday table, or just a sweet treat to brighten the week, this cake is your answer. Let’s create a dessert that’s as easy to make as it is impossible to resist.
Why This Recipe Truly Lives Up to Its Heavenly Name
Before we crush the crackers, let’s talk about what makes this dessert so divine:
· Truly No-Bake & Beginner-Friendly: Not a single oven needs to be turned on. It’s a foolproof dessert anyone can master.
· Make-Ahead Perfection: It requires chilling time, meaning you can make it a day or two ahead for completely effortless entertaining.
· Textural Symphony: The crunchy crust, dense, creamy filling, and light, airy topping create an unforgettable experience in every spoonful.
· Endlessly Adaptable: Change the pudding flavor, the crust, or the add-ins to create infinite heavenly variations (see ideas below!).
· Family-Friendly Crowd-Pleaser: Its creamy, sweet, familiar flavors are loved by both kids and adults, making it perfect for any gathering.
Ingredients for Heavenly Layers
This recipe builds flavor and texture through its distinct layers.
For the Graham Cracker Crust:
· 2 cups graham cracker crumbs (about 16 full sheets)
· ½ cup (1 stick / 113g) unsalted butter, melted
· ¼ cup granulated sugar
For the Creamy Cheesecake Layer:
· 1 (8 oz) block full-fat cream cheese, softened to room temperature
· 1 cup powdered sugar, sifted
· 1 (8 oz) tub frozen whipped topping (like Cool Whip®), thawed, divided
For the Pudding Layer:
· 2 (3.4 oz) packages instant vanilla pudding mix*
· 3 cups cold whole milk
For the Final Fluffy Topping & Garnish:
· Remaining whipped topping from the 16 oz tub
· Fresh berries, chocolate shavings, or crushed graham crackers
Pro-Tip Ingredient Notes:
· Cream Cheese: Use full-fat, brick-style. Low-fat or whipped varieties will make the layer runny. Softening is non-negotiable for a smooth filling.
· Whipped Topping: This stabilizes the layers. For a from-scratch option, whip 3 cups of heavy cream with ⅓ cup powdered sugar, dividing it as the recipe indicates.
· Pudding Mix: Instant pudding is required. Cook-and-serve will not set properly. For a different flavor, use cheesecake, lemon, or white chocolate pudding.
· Pudding Flavor Variations: The classic is vanilla or cheesecake. For a chocolate heaven, use chocolate pudding. For leony heaven, use lemon pudding.
Step-by-Step Instructions: Building Your Edible Cloud
The process is all about the layers. Follow this order for a stunning, sliceable dessert.
Step 1: Make the Crust
In a medium bowl, mix graham cracker crumbs, melted butter, and sugar until it resembles wet sand.
Press the mixture firmly and evenly into the bottom of a 9×13 inch baking dish. Use the bottom of a measuring cup to pack it down tightly.
Place in the refrigerator to set while you prepare the next layers.
Step 2: Create the Cream Cheese Layer
In a large bowl, beat the softened cream cheese with an electric mixer until smooth.
Add the sifted powdered sugar and beat until fully combined and creamy.
Gently fold in ONE HALF (about 4 oz) of the thawed whipped topping until no white streaks remain.
Spread this mixture evenly over the chilled crust. Return dish to the fridge.
Step 3: Make the Pudding Layer
In a large bowl, whisk the instant pudding mixes with the cold milk for 2 minutes. It will thicken quickly.
Immediately pour and spread the pudding over the cream cheese layer. Work relatively fast as the pudding sets.
Step 4: Top & Chill to Set
Carefully spread the remaining whipped topping over the pudding layer, creating a smooth, fluffy cloud.
Cover the dish tightly with plastic wrap.
Refrigerate for at least 6 hours, but ideally overnight (12 hours). This chilling time is crucial for all the layers to firm up and meld, allowing you to cut clean slices.
Step 5: Garnish & Serve
Just before serving, garnish with fresh berries, a drizzle of chocolate sauce, or a sprinkle of graham cracker crumbs.
Cut into squares and serve cold. Enjoy the heavenly layers!
Expert Tips for Flawless Heavenly Slices
· Press the Crust Firmly: A well-packed crust won’t crumble when you slice into it.
· Room Temperature Cream Cheese: This is the #1 rule for a lump-free, silky cream cheese layer.
· Use COLD Milk for Pudding: Cold milk activates the instant pudding’s thickeners properly. Warm milk will result in a runny layer.
· Chill Time is Sacred: Do not shortcut the chilling. The cake needs the full time to set properly for serving.
· Clean Slices: Dip a sharp knife in hot water and wipe it dry before each cut for beautifully clean layers.
Delicious “Slice of Heaven” Variations to Try
· Chocolate Lover’s Heaven: Use an Oreo cookie crust, chocolate pudding, and garnish with chocolate curls.
· Lemon Berry Heaven: Use a vanilla wafer crust, lemon pudding, and top with a mix of fresh blueberries and raspberries.
· Tropical Heaven: Use a vanilla wafer or shortbread crust, coconut cream pudding, and fold 1 cup of toasted coconut into the whipped topping.
· Pumpkin Spice Heaven: Add ½ cup of pumpkin puree and 1 tsp of pumpkin pie spice to the cream cheese layer. Use butterscotch pudding.
· Strawberry Shortcake Heaven: Use a shortbread crust, cheesecake pudding, and swirl ½ cup of strawberry puree into the whipped topping layer.
Frequently Asked Questions (FAQ)
Can I use homemade whipped cream instead of whipped topping?
Yes!Whip 3 cups of heavy cream with ⅓ cup powdered sugar until stiff peaks form. Use half in the cream cheese layer and half for the top. Note: It may not hold its structure for as many days.
How far in advance can I make this?
It’s perfect for making 1-2 days ahead.The flavor improves, and it holds its structure beautifully. Keep it covered in the refrigerator.
How long does it last in the fridge?
Covered tightly,it will stay fresh for 3-4 days.
Can I freeze “Slice of Heaven” Cake?
It’s not recommended.The dairy and pudding layers can become watery and grainy upon thawing, ruining the delicate texture.
My layers are runny/mixed. What happened?
This is usually due to:1) Cream cheese wasn’t fully softened, 2) Pudding was made with warm milk or not whisked enough, or 3) The cake wasn’t chilled long enough before serving. Ensure each layer is properly set before adding the next.
A Slice of Heaven Cake is more than a dessert; it’s a celebration of simplicity and joy. It proves that the most impressive creations often come from the humblest ingredients and a little patience. It’s the dessert that creates memories—the one everyone remembers you for.
With its no-bake ease and make-ahead convenience, it’s a recipe that empowers you to create something spectacular, leaving you free to enjoy your own party. So, layer up, chill down, and get ready to serve a little piece of heaven.
Now, I’d love to see your creation! What flavor variation did you try? How did your layers turn out? Share your photos and stories in the comments below!
Love easy, no-bake layered desserts? You have to try my Famous Lemon Lush or Icebox Oreo Dessert next!
More Recipes You Might Like
-

Crock Pot Chicken And Noodles Belongs
The Ultimate Comfort: Why 4-Ingredient Crock Pot Chicken And Noodles Belongs in Your Weekly Rotation There is a specific, almost…
-
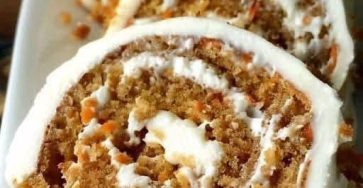
Carrot Cake Roll with Cream Cheese Frosting
The Swirl of Perfection: Why Carrot Cake Roll with Cream Cheese Frosting Is the Dessert That Steals the Show There…
-

LOADED CHEESY POCKET TACOS
The Handheld Fiesta: Why Loaded Cheesy Pocket Tacos Are the Dinner Revolution You Need There is a specific, almost primal…