There was a specific, electric moment in the school cafeteria line. You had survived morning math. You had endured the spelling pre-test. Your jeans felt stiff and new, your Trapper Keeper was still unripped, and the lunch lady was sliding a spatula through a tray of golden, soft-baked peanut butter bars.
They were not cookies. They were not cake. They were something in between—dense and chewy, with that signature crisscross pattern pressed into the top, the fork marks of a thousand school lunches. They came on a rectangle of wax paper, slightly warm from the oven, and they cost exactly fifty cents or one full punch on your lunch card.
You ate them in three bites. You licked the paper. You asked your friends for bites of theirs. You spent the rest of the day hoping they would appear again tomorrow.
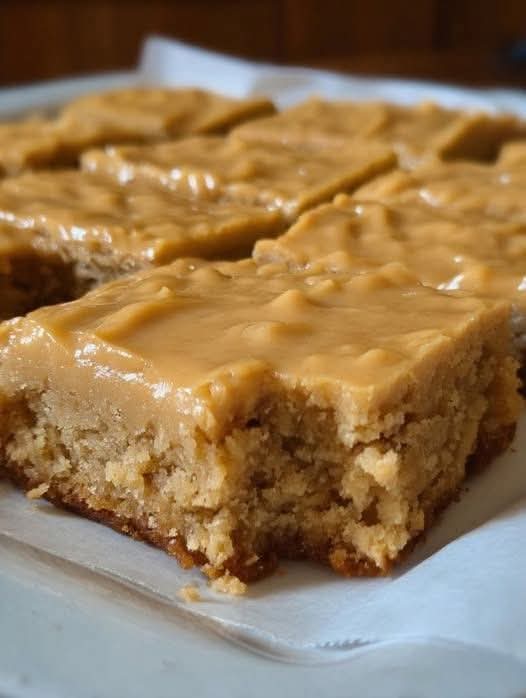
These are those bars. Not an approximation. Not an adult reinterpretation with sea salt and artisanal peanut butter and a $12 price tag at a bakery with exposed brick. These are the real ones. The lunch lady bars. The traybakes that sustained an entire generation of American schoolchildren through the long afternoon stretch between recess and the final bell.
Peanut butter lunch lady cookie bars are not trying to be sophisticated. They are not competing for a spot in a French pastry case. They are soft, sturdy, peanut-buttery, chocolate-studded rectangles of pure, unpretentious joy. They are the taste of childhood, baked into a 9×13 pan.
If you are searching for easy cafeteria-style desserts that feed a crowd without requiring fancy equipment, or if you need vintage school lunch recipes that transport adults directly back to 1992, these bars are your time machine. They are the ultimate comfort baking project. They are the cookie bar that refuses to be forgotten.
The Lunch Lady Legacy
Let us pause to appreciate the cultural institution that was the school lunch lady. She wore a hairnet and a plastic apron. She wielded a stainless steel ladle like a scepter. She called you “hon” and somehow remembered that you did not like the green beans. She baked in industrial convection ovens that could produce twelve dozen cookies simultaneously, and she made it look effortless.
The peanut butter bar was her masterpiece. It utilized shelf-stable ingredients. It required no rolling, no chilling, no intricate decorating. It baked in a single pan and yielded enough portions for an entire grade level. It was soft enough for small hands and sturdy enough to survive a backpack.
These bars are a tribute to her. They are also, conveniently, the perfect solution for every modern baking dilemma.
Need a treat for the bake sale that won’t crumble into dust in the car? These bars travel like champions. Need a dessert for the potluck that doesn’t require plates and forks? Cut them into squares and provide napkins. Need a afternoon snack that will actually satisfy hungry children until dinner? One bar contains approximately the caloric density of a small meal. Need a recipe that your seven-year-old can execute independently with minimal supervision? This is that recipe.
The Anatomy of the Perfect Lunch Lady Bar
Before we discuss ingredients, we must understand what makes these bars distinct from regular peanut butter cookies or peanut butter blondies.
The Texture: These bars are not crispy. They are not crunchy. They are soft, dense, and almost fudge-like in their richness. The edges are slightly firmer than the center, but the entire bar should yield easily to a fork. Overbaking is the enemy; these bars are best when they are just barely set.
The Peanut Butter: School lunch ladies used shelf-stable, hydrogenated peanut butter like Jif or Skippy. This is not the moment for natural, oily, stirred peanut butter. Natural peanut butter separates and produces greasy, crumbly bars that do not hold together. You need the processed stuff. Embrace it.
The Chocolate: Semi-sweet chocolate chips are the standard. Milk chocolate is too sweet against the already-sweet peanut butter base. Dark chocolate provides pleasant bitterness. Mini chips distribute more evenly than full-size chips. If you are feeling fancy, chop a chocolate bar into rough shards for pools of melted chocolate rather than discrete chips.
The Crisscross: This is non-negotiable. The fork marks pressed into the top before baking are not merely decorative. They create texture, increase surface area, and signal to anyone who sees these bars exactly what they are about to experience. Skip the crisscross and you have made peanut butter blondies, which are delicious but which are not lunch lady bars.
The Frosting Question
There is a theological divide in the lunch lady bar community. Some remember these bars as bare, their tops dusted lightly with powdered sugar. Others recall a thin layer of chocolate frosting, spread while the bars were still warm, melting into the crevices and creating a fudge-like top layer.
Both memories are correct. Regional variations existed. Some lunch ladies frosted; some did not. Some sprinkled the top with additional peanut butter chips; some pressed a single chocolate chip into the center of each square.
I am here to tell you that the frosted version is superior. Not a thick, buttercream layer—a thin, almost glaze-like chocolate spread that hardens slightly into a shell. It adds moisture, richness, and visual appeal. It also provides additional surface area for the flaky salt that you are absolutely going to sprinkle on top.
The Ultimate Peanut Butter Lunch Lady Cookie Bar Recipe
Yield: 24 generous bars, or 36 reasonable ones, or 12 if you are baking for people who understand portion control
Ingredients:
For the Bars:
· 1 cup unsalted butter, softened
· 1 cup creamy peanut butter (processed, not natural)
· 1 cup granulated sugar
· 1 cup packed brown sugar (light or dark, both work)
· 2 large eggs, room temperature
· 1 teaspoon vanilla extract
· 2 cups all-purpose flour
· 1 teaspoon baking soda
· ½ teaspoon baking powder
· ½ teaspoon salt
· 2 cups semi-sweet chocolate chips
For the Chocolate Frosting (Optional but Correct):
· 2 cups powdered sugar
· ¼ cup unsweetened cocoa powder
· ¼ cup creamy peanut butter
· 3-4 tablespoons milk
· 1 teaspoon vanilla extract
· Pinch of salt
For the Finish:
· Flaky sea salt (Maldon, Jacobsen, or similar)
Instructions:
Phase One: The Bars
Preheat and Prepare: Preheat your oven to 350°F (175°C). Grease a 9×13-inch baking pan thoroughly, then line it with parchment paper, leaving overhang on the long sides. This creates handles for lifting the entire slab. Grease the parchment as well. Do not skip this.
Cream the Fat and Sugar: In a large bowl or the bowl of a stand mixer, beat the softened butter and peanut butter together until smooth and combined. Add both sugars and beat on medium-high speed until light and fluffy, about 3 minutes. Scrape down the bowl.
Add the Eggs and Vanilla: Add the eggs one at a time, beating well after each addition. Beat in the vanilla. The mixture should look smooth, glossy, and slightly aerated.
Add the Dry Ingredients: In a separate bowl, whisk together the flour, baking soda, baking powder, and salt. Gradually add the dry ingredients to the wet ingredients, mixing on low speed until just combined. Do not overmix. Overmixing develops gluten and yields tough, dense bars rather than tender, soft ones.
Add the Chocolate Chips: Fold in the chocolate chips by hand with a spatula. Reserve a small handful to press into the top if you want that classic, bakery-display appearance.
Spread in the Pan: Scrape the dough into the prepared pan. It will be thick and stiff. Use an offset spatula or lightly oiled hands to press it into an even layer. This dough does not self-level; you must help it.
The Crisscross: Here it is. Take a dinner fork and dip the tines in water or lightly coat with nonstick spray. Press into the dough in parallel lines, then perpendicular lines, creating that iconic grid pattern. Press firmly enough to leave deep indentations but not so firmly that you hit the bottom of the pan.
Bake: Bake for 20-25 minutes, rotating the pan halfway through. The bars are done when the edges are golden brown and the center is just set. A toothpick inserted into the center should come out with moist crumbs, not wet batter. Do not overbake. Overbaked lunch lady bars are a tragedy.
Cool: Place the pan on a wire rack and cool completely. If you are frosting, the bars should be completely cool. If you are not frosting, sprinkle with flaky sea salt while still warm.
Phase Two: The Frosting (The Correct Choice)
Combine Dry Ingredients: In a medium bowl, sift or whisk together the powdered sugar and cocoa powder. This prevents lumps.
Add Wet Ingredients: Add the peanut butter, 3 tablespoons of milk, vanilla, and salt. Stir vigorously until smooth. Add the remaining tablespoon of milk if needed to achieve a spreadable consistency. The frosting should be thin enough to spread easily but thick enough to stay on top of the bars rather than soaking in.
Frost: Pour the frosting over the cooled bars. Spread evenly with an offset spatula. Immediately sprinkle with flaky sea salt.
Set: Allow the frosting to set for at least 30 minutes before slicing. This prevents the frosting from smearing onto your knife and ruining clean edges.
Phase Three: The Slice
Lift: Use the parchment handles to lift the entire slab out of the pan. Place on a cutting board.
Slice: Using a large, sharp chef’s knife, slice into 24 or 36 squares. Wipe the blade clean between cuts for the cleanest edges. If you frosted the bars, dip the knife in hot water and dry it thoroughly before each cut. This prevents the frosting from dragging.
Serve: Arrange on a platter. Watch them disappear. Listen to the adults sigh with recognition and say, “Oh my god, these are the lunch lady bars.”
The Ingredient Theology
Let us discuss the specifics with the gravity they deserve.
The Peanut Butter: You need Jif. Or Skippy. Or the store brand equivalent. You need peanut butter that contains sugar, hydrogenated oil, and salt. You do not need peanut butter that contains only peanuts and salt. That peanut butter is virtuous and delicious on toast, but it will sabotage your bars. The oil separates during baking, leaving you with greasy, crumbly rectangles that lack structural integrity. Do not be virtuous. Be delicious.
The Butter: Unsalted butter allows you to control the salt level. If you only have salted butter, reduce the added salt in the dough to ¼ teaspoon.
The Sugar: Brown sugar adds moisture and chewiness. White sugar adds crispness and spread. The combination provides the ideal texture. Do not substitute all brown sugar or all white sugar; the balance matters.
The Eggs: Room temperature eggs incorporate more evenly into creamed butter and sugar. Cold eggs can cause the batter to seize or appear curdled. Set your eggs on the counter while you gather your other ingredients.
The Flour: All-purpose flour is correct. Do not substitute bread flour (too much gluten) or cake flour (too little structure). Measure correctly by spooning flour into your measuring cup and leveling with a knife. Scooping directly from the bag compresses the flour and adds up to 25% more than intended.
The Chocolate Chips: Semi-sweet is the standard. Milk chocolate produces a bar that is overwhelmingly sweet. Dark chocolate (60-70%) provides pleasant contrast. Mini chips distribute more evenly. Chopped chocolate bars create irregular pools of chocolate that some find superior.
The Bake Time Variable
Here is the truth that recipe developers do not like to admit: ovens lie. Your oven’s 350°F is not my oven’s 350°F. Your baking pan conducts heat differently than mine. Your altitude affects baking time.
The range of 20-25 minutes is not a suggestion. It is a spectrum. Start checking at 18 minutes if your oven runs hot. The bars are done when:
· The edges are visibly golden brown and slightly pulling away from the pan.
· The surface appears set and dry, not glossy or wet.
· A toothpick inserted into the center comes out with moist crumbs clinging to it, not raw batter.
· The entire kitchen smells like peanut butter and toasted sugar.
When in doubt, underbake slightly. These bars continue to cook from residual heat after removal from the oven. Overbaked bars are dry and crumbly. Underbaked bars are fudge-like and luxurious.
The Crisscross: A Masterclass
The fork marks are not merely decorative. They serve three functions.
First, they flatten the dough into an even layer without overworking it. Second, they create channels that catch the frosting (if using) and provide additional textural interest. Third, they signal to anyone who sees these bars exactly what they are about to experience. The crisscross is the lunch lady bar’s signature, its fingerprint, its brand.
To execute properly:
Dip the fork tines in water or lightly coat with nonstick spray.
Press firmly and decisively. Tentative fork marks disappear during baking.
Press in one direction, then the perpendicular direction. Do not drag; lift and press.
Re-dip the fork as needed to prevent sticking.
Work quickly before the dough warms and becomes stickier.
If your fork marks bake together and disappear, your dough was too warm or you did not press deeply enough. Chill the pan for 15 minutes before baking for more pronounced marks.
The Flavor Universe: Infinite Lunch Lady Variations
The peanut butter chocolate chip version is canonical. But the template is forgiving and adaptable.
Chocolate Peanut Butter Swirl Bars: Reserve ½ cup of the peanut butter dough. Add 2 tablespoons cocoa powder and 1 tablespoon milk to the reserved dough. Drop spoonfuls of chocolate dough over the base dough and swirl with a knife before pressing the crisscross.
Peanut Butter Oatmeal Bars: Replace 1 cup of the all-purpose flour with 1 cup rolled oats. Add ½ teaspoon cinnamon. The oats add chewiness and a rustic texture. These are the breakfast-approved version.
Peanut Butter Jam Bars: Spread ¾ cup of your favorite jam (strawberry, raspberry, or grape) over the dough before baking. Swirl lightly with a knife. The jam bubbles up around the edges and creates sticky, fruity pockets. These are the lunch box version.
Reese’s Cup Bars: Replace the chocolate chips with chopped Reese’s Peanut Butter Cups. Press additional chopped cups into the top before baking. This is the maximum-indulgence version.
Peanut Butter Coconut Bars: Add 1 cup sweetened shredded coconut to the dough. Toast additional coconut and sprinkle over the frosting. These are the tropical vacation version.
Salted Honey Peanut Butter Bars: Replace the granulated sugar with honey (reduce to ¾ cup and add ¼ cup milk to compensate for moisture). Use the frosting but omit the cocoa powder for a honey-peanut butter glaze. Sprinkle heavily with flaky salt. These are the elevated, adult dinner party version.
The Storage Question
Lunch lady bars are durable, but they are not immortal. Here is how to maintain optimal texture.
Room Temperature: Store in an airtight container at room temperature for up to 5 days. Place a sheet of wax paper between layers to prevent sticking. Do not refrigerate; refrigeration dries out baked goods and stiffens the peanut butter.
Freezer: These bars freeze spectacularly well. Wrap individual bars tightly in plastic wrap, then place in a freezer bag. Freeze for up to 3 months. Thaw at room temperature for 1 hour. They taste nearly identical to fresh-baked.
The Frosting Question, Revisited: Frosted bars do not stack as neatly. Store them in a single layer, or place parchment between layers and accept some smudging. Unfrosted bars stack beautifully.
The Lunch Box Deployment
These bars were designed for lunch boxes. They are sturdy, shelf-stable, and beloved by children. To deploy them effectively:
Wrap individual bars in wax paper or plastic wrap.
Place in the lunch box just before the child leaves for school.
Include a napkin. These bars are not tidy.
Accept that the bar may be traded for a bag of chips or a pudding cup. This is the economy of the elementary school cafeteria. Do not take it personally.
Troubleshooting: When Bars Go Wrong
The Bars Are Dry and Crumbly: You overbaked them, or you measured your flour incorrectly. Next time, bake for less time and spoon your flour into the measuring cup rather than scooping. For this batch, crumble them over vanilla ice cream and call it a sundae.
The Bars Are Greasy: You used natural peanut butter, or your butter was too soft. Next time, use processed peanut butter and ensure your butter is softened but not melted. For this batch, blot the surface with paper towels and accept that they are still delicious.
The Bars Spread Too Thin: Your butter was too warm, or you used too much sugar. Next time, chill the dough in the pan for 30 minutes before baking. For this batch, cut them into smaller squares and pretend they were intended to be thin and crispy.
The Chocolate Chips Sank to the Bottom: Your dough was too thin, or you used mini chips that migrated during baking. Next time, toss the chips in 1 tablespoon of flour before adding to the dough. For this batch, serve them upside down.
The Crisscross Disappeared: You did not press deeply enough, or your dough was too warm. Next time, press more firmly and chill the pan before baking. For this batch, drizzle with melted chocolate to create decorative lines.
The Frosting Is Too Thick: You did not add enough milk. Add additional milk one teaspoon at a time until spreadable. If it becomes too thin, add more powdered sugar.
The Frosting Is Too Thin: You added too much milk. Add additional powdered sugar one tablespoon at a time until thickened.
The Sentimental Bar
My grandmother was not a lunch lady. She was a cafeteria monitor, which meant she patrolled the lunchroom with a whistle and a stern expression, enforcing the rule that we could not leave our seats until we had finished our milk. She was not warm. She was not cuddly. She was not the grandmother who baked cookies.
But once a year, for the Christmas bake sale, she made peanut butter bars. She used the recipe from the church cookbook, which called for margarine and omitted the chocolate chips because they were too expensive. She pressed the crisscross with a fork that had bent tines. She cut them into uneven squares and wrapped them in wax paper twisted at the ends.
I did not appreciate them then. I wanted the frosted sugar cookies with the sprinkles. I wanted the Rice Krispie treats shaped like wreaths. I wanted the effort, the decoration, the visible proof that someone had labored over my dessert.
Now I understand. The labor was invisible. The labor was the margarine, softened on the counter, creamed by hand because the electric mixer was broken. The labor was the decision to omit the chocolate chips so there would be enough money for the angel food cake mix that my brother preferred. The labor was the bent-tined fork, pressed into dough, over and over, for forty-eight squares.
That is the secret, I think. Not the precise ratio of butter to sugar or the exact bake time or the brand of peanut butter. The secret is that lunch lady bars have always been about feeding people without fanfare. They are not the dessert that demands attention. They are the dessert that sustains.
Make these bars for the bake sale. Make them for the potluck. Make them for your own children, who will not understand their significance until they are thirty years old and crying over a bowl of cookie dough in their own kitchen. Make them because they are fast and cheap and everyone loves them.
Make them because people like to eat.
And then stand at the counter, eating a bar still warm from the oven, the chocolate melting onto your fingers, the peanut butter clinging to the roof of your mouth, and know that you have done something ancient and good. You have carried a recipe forward. You have fed the people in front of you. You have remembered the lunch ladies and the cafeteria monitors and the grandmothers who baked with margarine and bent-tined forks.
That is not just baking. That is memory. That is continuity. That is love, pressed into a 9×13 pan and cut into uneven squares.
Memorize this recipe. It will never let you down. It will raise the next generation the way it raised you. It is the taste of childhood, and it is ready whenever you are.
More Recipes You Might Like
-
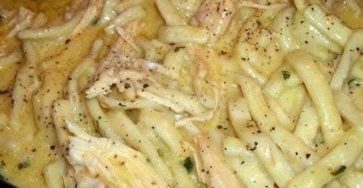
Crock Pot Chicken And Noodles Belongs
The Ultimate Comfort: Why 4-Ingredient Crock Pot Chicken And Noodles Belongs in Your Weekly Rotation There is a specific, almost…
-
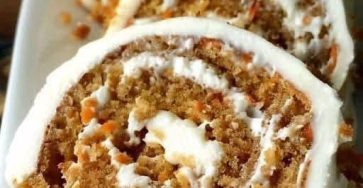
Carrot Cake Roll with Cream Cheese Frosting
The Swirl of Perfection: Why Carrot Cake Roll with Cream Cheese Frosting Is the Dessert That Steals the Show There…
-
LOADED CHEESY POCKET TACOS
The Handheld Fiesta: Why Loaded Cheesy Pocket Tacos Are the Dinner Revolution You Need There is a specific, almost primal…