
The Handheld Fiesta: Why Loaded Cheesy Pocket Tacos Are the Dinner Revolution You Need
There is a specific, almost primal joy that comes from food you can hold in your hands. It is the joy of street food, of fairgrounds, of childhood birthday parties where pizza and hot dogs reigned supreme. There is something about food that requires no plate, no fork, no knife—just your hands and your appetite—that feels like freedom.
Now imagine that freedom combined with everything you love about tacos. The seasoned beef. The melty cheese. The cool sour cream. The fresh lettuce and tomato. The whole glorious, messy, wonderful experience of taco night—but contained in a perfect, portable, impossible-to-drop pocket.
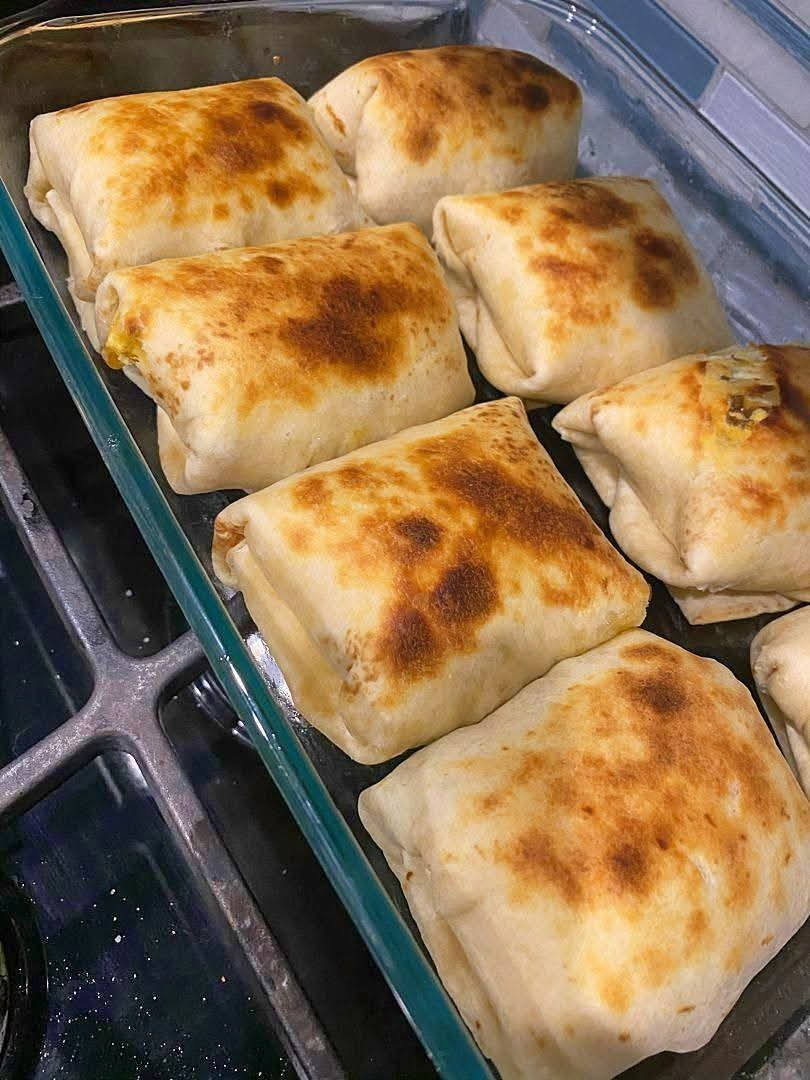
Loaded cheesy pocket tacos are that dream made real. They are everything you love about tacos, wrapped in a warm, golden tortilla that has been grilled to perfection and sealed shut so all the goodness stays inside. No more fillings falling out onto your plate. No more taco shells shattering at the first bite. No more lettuce avalanches. Just pure, unadulterated taco bliss, in every single bite.
They are perfect for weeknight dinners when you want something fun. They are perfect for game day when you need food you can eat with one hand while cheering with the other. They are perfect for picky eaters who love the idea of a “pocket” filled with their favorite things. They are, in short, the dinner revolution you did not know you were waiting for.
If you are searching for easy taco recipes that kids actually love, or if you need handheld dinner ideas that please a crowd, these loaded cheesy pocket tacos are your answer. They are the proof that sometimes the best ideas are the simplest ones. They are the taste of fiesta, made portable.
The Genius of the Pocket
The concept of stuffing fillings inside bread is as old as civilization itself. Empanadas, samosas, calzones, pasties, pierogies—every culture has figured out that putting good things inside dough is a brilliant idea. The pocket protects the filling, makes it portable, and creates a perfect ratio of bread to filling in every bite.
Tacos have always been a little messy. Hard shells shatter. Soft shells drip. Even the most carefully constructed taco inevitably loses some of its contents to the plate below. The pocket taco solves this problem entirely. By sealing the edges, you create a contained vessel that holds every single bit of goodness until you are ready to eat it.
And when you bite in? The first thing you hit is warm, slightly crisp tortilla. Then the cheese, melted and gooey. Then the seasoned beef, the cool sour cream, the fresh crunch of lettuce and tomato. Every bite is perfect. Every bite contains everything.
The Anatomy of Perfect Loaded Cheesy Pocket Tacos
Great loaded cheesy pocket tacos have five essential components.
The Tortilla: Flour tortillas are ideal. They are pliable, sturdy, and seal well. Look for “burrito size” or large soft taco size—at least 8 inches in diameter.
The Filling: Seasoned ground beef is classic, but you can use chicken, turkey, beans, or any taco filling you love. The key is to have it cooked and ready to go.
The Cheese: Melty cheese is essential. A blend of cheddar and Monterey Jack is perfect. The cheese acts as glue, helping to seal the pocket and holding everything together.
The Toppings: This is where “loaded” comes in. Sour cream, lettuce, tomato, onion, jalapeños—whatever you love on your tacos. The key is to not overfill; you need to be able to seal the pocket.
The Seal: The edges must be sealed tightly so nothing leaks out. A little water and a fork crimp do the job perfectly.
The Ultimate Loaded Cheesy Pocket Tacos Recipe
Yield: 6-8 pocket tacos
Ingredients:
For the Beef Filling:
· 1 lb ground beef (80/20)
· ½ cup finely diced onion
· 2 cloves garlic, minced
· 1 packet (1 oz) taco seasoning (or homemade blend)
· ⅓ cup water
For Assembly:
· 6-8 large flour tortillas (burrito size)
· 2 cups shredded cheese (cheddar, Monterey Jack, or a blend)
· 1 cup sour cream
· 1 cup shredded lettuce
· 1 cup diced tomatoes
· ½ cup diced onion (optional)
· ¼ cup sliced jalapeños (optional)
· 2 tablespoons butter or oil, for grilling
For Serving:
· Salsa
· Additional sour cream
· Guacamole
· Hot sauce
Instructions:
Phase One: Prepare the Beef Filling
Brown the Beef: In a large skillet over medium-high heat, cook the ground beef, breaking it up with a spoon, until browned and cooked through, about 8-10 minutes. Drain excess fat.
Add Onion and Garlic: Add the diced onion and cook for 3-4 minutes until softened. Add the garlic and cook for 1 minute more.
Season: Sprinkle the taco seasoning over the beef and add the water. Stir to combine. Bring to a simmer and cook for 2-3 minutes until slightly thickened. Remove from heat and set aside.
Phase Two: Assemble the Pockets
Warm Tortillas: Warm the tortillas slightly to make them more pliable. You can microwave them for 20-30 seconds or heat them in a dry skillet.
Lay Out Tortillas: Place the tortillas on a clean work surface.
Add Fillings: On one half of each tortilla, layer the following: a sprinkle of cheese, a spoonful of beef mixture, a dollop of sour cream, a pinch of lettuce and tomatoes, and any other desired toppings. Top with another sprinkle of cheese—this helps seal everything together.
Fold and Seal: Fold the empty half of the tortilla over the filling to create a half-moon shape. Press down gently. Use a fork to crimp the edges firmly, sealing the pocket. The cheese will help hold it together when it melts.
Phase Three: Cook the Pockets
Heat the Pan: Heat a large skillet or griddle over medium heat. Add a little butter or oil.
Grill: Place the pocket tacos in the skillet, working in batches if needed. Cook for 3-4 minutes per side, until golden brown and crisp, and the cheese is melted inside.
Keep Warm: Transfer cooked pockets to a baking sheet in a 200°F oven to keep warm while you cook the remaining batches.
Phase Four: Serve
Serve Immediately: Serve hot, with salsa, sour cream, guacamole, and hot sauce on the side.
Enjoy: Watch your family’s eyes light up as they bite into these perfect, portable pockets of taco goodness.
The Tortilla Selection
The tortilla is the vessel. Choose wisely.
Flour Tortillas: The best choice for pocket tacos. They are pliable, seal well, and get beautifully golden when grilled. Look for “burrito size” (10 inches) or “soft taco size” (8 inches).
Corn Tortillas: Too small and prone to cracking. Not recommended for this application.
Gluten-Free Tortillas: Many gluten-free flour tortillas work well. Look for brands that are pliable and not prone to cracking.
Homemade Tortillas: If you have the time and inclination, homemade flour tortillas take these to another level.
The Cheese Strategy
Cheese does double duty here. Here is why.
Flavor: Melted cheese is delicious. It is a key part of the “loaded” experience.
Glue: The cheese helps hold the filling together and acts as an adhesive when you seal the pocket. A little cheese at the edge helps the seal hold.
Melting: Use a good melting cheese. Cheddar, Monterey Jack, pepper jack, or a blend all work beautifully.
The Filling Ratio
Do not overfill. This is the most common mistake.
Less is More: You need to be able to fold the tortilla and seal the edges. Too much filling makes this impossible.
Balance: Aim for about ½ to ⅔ cup of total filling per pocket, depending on the size of your tortillas.
Cheese First: Putting cheese down first creates a barrier that helps prevent the tortilla from getting soggy.
The Seal Technique
A good seal is essential. Here is how to ensure it.
Fork Crimp: After folding, press the edges firmly with a fork. This creates a decorative edge and ensures a tight seal.
Water: If the edges are not sticking, dip your finger in water and moisten the inside edge before folding. This helps create a seal.
Cheese at the Edge: A little cheese right at the edge melts and helps glue the pocket shut.
The Flavor Universe: Endless Variations
The classic beef version is perfect. But variations are endless.
Chicken Fiesta Pockets:
Use shredded seasoned chicken instead of beef. Add corn and black beans to the filling. Use pepper jack cheese.
Breakfast Pockets:
Fill with scrambled eggs, cooked breakfast sausage or bacon, and cheddar cheese. Serve with salsa. These are incredible.
Buffalo Chicken Pockets:
Use shredded chicken tossed in buffalo sauce. Add a little ranch or blue cheese dressing inside. Use mozzarella or provolone.
Veggie Supreme Pockets:
Use black beans, corn, sautéed peppers and onions, and lots of cheese. Add avocado after cooking.
Steak and Cheese Pockets:
Use thinly sliced steak, sautéed onions and peppers, and provolone cheese. Serve with salsa verde.
BBQ Chicken Pockets:
Use shredded chicken tossed in BBQ sauce. Add corn and red onion. Use cheddar cheese.
The Cooking Method
Grilling the pockets is essential. Here is why.
Crisp Exterior: The butter or oil creates a golden, slightly crisp exterior that contrasts beautifully with the soft interior.
Melts the Cheese: The heat melts the cheese, which then glues everything together.
Seals the Deal: Grilling helps set the seal, ensuring nothing leaks out.
Flavor: That buttery, toasty flavor is irresistible.
The Make-Ahead Advantage
These pockets are great for make-ahead meals.
Assemble, Refrigerate: Assemble the pockets, place on a baking sheet, cover, and refrigerate for up to 24 hours. Grill as directed, adding a minute or two to cooking time.
Assemble, Freeze: Assemble the pockets, place on a baking sheet, freeze until solid, then transfer to freezer bags. Grill from frozen, adding 3-5 minutes to cooking time.
Cook, Then Reheat: Cooked pockets can be refrigerated and reheated in a skillet or oven. They are best within 2 days.
The Serving Question
How to serve these pockets? Here are the options.
With Salsa: Classic. Provide a bowl for dipping.
With Sour Cream: Cool and tangy, perfect with the warm pockets.
With Guacamole: Creamy, rich, essential.
With Rice and Beans: For a full meal, serve with Mexican rice and refried beans.
With Salad: A simple green salad balances the richness.
The Kid-Friendly Factor
Children love these pockets. Here is why.
Handheld: Kids love food they can hold.
Customizable: Let them choose their own fillings. This is a great way to get kids involved in cooking.
Familiar Flavors: Taco flavors are universally beloved.
No Mess: The pocket contains everything. Less mess for you.
The Leftover Strategy
Leftovers are a gift. Here is how to use them.
Reheat: Reheat in a skillet over medium heat until warmed through and crisp. Do not microwave; they will become soggy.
Pocket Salad: Chop leftover pockets and serve over lettuce with extra toppings. This is taco salad, deconstructed.
Pocket Nachos: Chop and use as nacho toppings.
Pocket Breakfast: Serve with a fried egg on top.
Troubleshooting: When Pockets Go Wrong
The Pockets Leak: You overfilled them, or you did not seal them properly. Next time, use less filling and crimp firmly.
The Pockets Burn Before the Cheese Melts: Your heat was too high. Next time, use medium heat and cook longer.
The Tortillas Crack: They were too cold, or you overfilled them. Next time, warm tortillas before filling.
The Pockets Are Soggy: You added too many wet ingredients, or you did not cook them long enough. Next time, drain wet ingredients well and cook until crisp.
The Cheese Did Not Melt: You did not cook them long enough, or your heat was too low. Next time, cook until golden and cheese is melted.
The Pockets Fall Apart: You did not seal them well, or your tortillas were too small. Next time, seal firmly and use larger tortillas.
The Sentimental Pocket
My son was three years old the first time I made something like these. He was in his picky phase, the one where everything was rejected except chicken nuggets and macaroni and cheese. I was desperate for something he would actually eat.
I made taco pockets on a whim, filling them with seasoned beef and cheese, grilling them until golden. I set one in front of him, not expecting much. He picked it up. He examined it. He took a bite.
His eyes widened. He took another bite. He looked at me with something like wonder and said, “Mama, this is the best thing ever.”
He ate three. Three whole pockets. I cried a little, in the kitchen, where he could not see me.
That is the secret, I think. Not the perfect seasoning or the ideal cheese blend or the right grilling time. The secret is that loaded cheesy pocket tacos are never really about the tacos. They are about the moments when food connects us. They are about the three-year-olds who finally eat something. They are about the parents who cry in kitchens because their children are fed and happy.
They are about feeding people, especially the ones who are hardest to feed.
Make these pockets for your picky eaters. Make them for game day. Make them for a fun weeknight dinner. Make them because they are easy and delicious and everyone loves them.
Make them because people like to eat.
And then sit at the table, watching your family bite into those golden pockets, watching the cheese stretch, watching the smiles spread, and know that you have done something ancient and good.
You have taken ground beef and tortillas and cheese and transformed them into joy. You have created a meal that brings people together. You have fed the people in front of you.
That is not just cooking. That is the handheld fiesta. That is the taste of happiness, made portable.
Memorize this recipe. It will never let you down. It will carry you through picky phases and busy nights and moments when you need dinner to be fun.
It is the taste of seasoned beef and melted cheese and crispy tortillas. It is the taste of joy. It is ready whenever you are.
More Recipes You Might Like
-
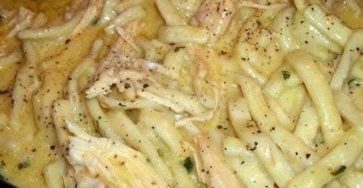
Crock Pot Chicken And Noodles Belongs
The Ultimate Comfort: Why 4-Ingredient Crock Pot Chicken And Noodles Belongs in Your Weekly Rotation There is a specific, almost…
-

Carrot Cake Roll with Cream Cheese Frosting
The Swirl of Perfection: Why Carrot Cake Roll with Cream Cheese Frosting Is the Dessert That Steals the Show There…
-
LOADED CHEESY POCKET TACOS
The Handheld Fiesta: Why Loaded Cheesy Pocket Tacos Are the Dinner Revolution You Need There is a specific, almost primal…