

Introduction
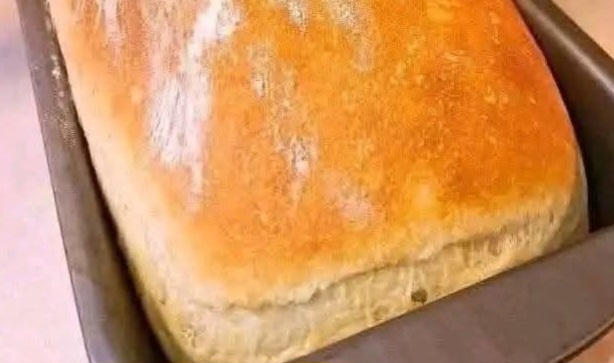
No Knead Sandwich Bread is a simple, homemade bread recipe that produces a soft, fluffy interior with a beautifully golden crust. Unlike traditional bread recipes that require extensive kneading, this method relies on time and a simple mixing technique to develop the dough’s structure. With basic pantry ingredients and minimal hands-on effort, you can make delicious bread perfect for sandwiches, toast, breakfast, or afternoon snacks.
Whether you’re a beginner baker or an experienced home cook, this recipe offers a convenient way to enjoy fresh, homemade bread without the hard work of kneading.
Origin and Cultural Significance
Bread has been a staple food in cultures around the world for thousands of years. Over time, sandwich bread became especially popular because of its soft texture, uniform slices, and versatility.
No-knead bread gained popularity among home bakers because it simplifies traditional bread-making techniques. Instead of spending time kneading the dough, bakers allow fermentation and resting to help develop flavor and texture.
Today, homemade sandwich bread is appreciated for its comforting aroma, customizable ingredients, and ability to bring families together around the table. It is a wonderful example of how traditional baking can be adapted to modern, busy lifestyles.
Ingredients Quantity
Preparation time: 10–15 minutes Rising time: 1½–2½ hours, depending on room temperature Baking time: 30–40 minutes Total time: Approximately 2½–3½ hours Yield: 1 standard loaf, about 10–12 slices
- 3 cups (375 g) all-purpose flour or bread flour
- 1¼ cups (300 ml) warm water
- 2 teaspoons (6–7 g) instant yeast
- 1 tablespoon (12 g) granulated sugar or honey
- 1 teaspoon (6 g) salt
- 2 tablespoons (30 ml) olive oil or melted butter
- A little extra oil or butter for greasing the loaf pan
Optional Additions
Customize your no-knead sandwich bread with these delicious additions:
- Whole wheat flour: Replace up to 1 cup of the all-purpose flour for a heartier loaf.
- Milk: Replace some of the water with milk for a softer, richer texture.
- Seeds: Add 2 tablespoons of sesame, sunflower, flax, or chia seeds.
- Herbs: Mix in dried rosemary, oregano, or thyme for extra aroma.
- Garlic: Add ½ teaspoon of garlic powder for a savory variation.
- Honey: Use honey instead of sugar for a subtle sweetness.
- Cheese: Fold in ½ cup of grated cheddar for a flavorful loaf.
Tips for Success
- Use warm, not hot, water. Water that is too hot can damage the yeast. Aim for approximately 100–110°F (38–43°C).
- Measure the flour correctly. Weighing the flour gives the most consistent results. Too much flour can make the bread dense.
- Expect a sticky dough. No-knead dough is usually softer and stickier than traditional bread dough.
- Allow enough rising time. Let the dough rise until noticeably puffy and approximately doubled in size.
- Grease the pan well. This helps prevent sticking and makes removing the loaf easier.
- Avoid overproofing. If the dough rises too much and collapses, the finished loaf may be dense.
- Check for doneness. The loaf should be golden brown and sound hollow when tapped. The center should reach approximately 190–200°F (88–93°C).
- Cool before slicing. Let the bread cool completely on a wire rack to prevent a gummy texture.
Instructions
Step 1: Mix the ingredients
In a large mixing bowl, combine the flour, instant yeast, sugar, and salt. Add the warm water and olive oil or melted butter. Stir with a wooden spoon until all the flour is incorporated and a sticky dough forms.
Step 2: Let the dough rise
Cover the bowl with a clean kitchen towel or plastic wrap. Leave it in a warm place for 1½–2 hours, or until the dough has become noticeably puffy and approximately doubled in size.
Step 3: Prepare the loaf pan
Grease a standard 9 × 5-inch loaf pan with butter or oil. Lightly flour your work surface if needed.
Step 4: Shape the dough
Gently transfer the dough onto the lightly floured surface. With lightly oiled or floured hands, fold the edges inward and shape the dough into a loaf. Avoid excessive handling because the recipe does not require kneading.
Place the dough seam-side down in the prepared loaf pan.
Step 5: Let it rise again
Cover the pan loosely and allow the dough to rise for another 30–45 minutes, or until it looks puffy and rises close to the top of the pan.
Meanwhile, preheat the oven to 375°F (190°C).
Step 6: Bake the bread
Place the loaf pan in the preheated oven and bake for 30–40 minutes, until the top is golden brown and the bread is cooked through.
If the top browns too quickly, loosely cover it with aluminum foil during the final part of baking.
Step 7: Cool and slice
Remove the loaf from the oven and let it rest in the pan for about 5–10 minutes. Carefully transfer it to a wire rack and allow it to cool completely before slicing.
Enjoy your homemade no-knead sandwich bread with your favorite spreads, fillings, or toppings.
Description
No Knead Sandwich Bread is soft, tender, and wonderfully versatile. Its light crumb makes it ideal for classic sandwiches, grilled cheese, toast with butter, or breakfast served with jam and honey.
The crust develops a gentle golden color, while the inside remains fluffy and easy to slice. Because the recipe uses everyday ingredients and requires no traditional kneading, it is an excellent choice for anyone who wants to enjoy freshly baked bread with less effort.
Homemade bread also allows you to control the ingredients, adjust the sweetness, and experiment with different flours and seeds to suit your preferences.
Nutritional Information
Approximate nutritional values per slice, assuming the loaf is divided into 12 slices:
- Calories: 135–155 kcal
- Carbohydrates: 25–28 g
- Protein: 3–5 g
- Fat: 2–4 g
- Fiber: 1–2 g
- Sugar: 1–3 g
- Sodium: 180–250 mg
Nutritional values vary depending on the flour, oil or butter, salt, and optional ingredients used. These estimates do not include additional spreads or sandwich fillings.
Conclusion and Recommendation
No Knead Sandwich Bread is an easy, reliable recipe for anyone who loves the taste and aroma of freshly baked bread. With minimal preparation, a simple rising process, and a short list of ingredients, you can create a loaf that is perfect for everyday meals.
Recommendation: Serve thick slices with scrambled eggs for breakfast, use them for turkey or chicken sandwiches at lunch, or toast them with a little butter for a comforting snack. For a heartier loaf, replace some of the white flour with whole wheat flour and add a handful of nutritious seeds.
Store the completely cooled bread in an airtight bag or container at room temperature for about 2–3 days. For longer storage, slice and freeze it for up to 3 months, separating slices if you want to remove them individually.
Embracing Healthful Indulgence
Homemade No Knead Sandwich Bread can be part of a balanced and enjoyable diet. Baking at home gives you the freedom to choose your ingredients, reduce added sugar, adjust the salt, and incorporate whole grains for additional fiber.
For a more nutritious version, replace up to half the all-purpose flour with whole wheat flour, add seeds, and pair each slice with protein-rich foods such as eggs, beans, tuna, or lean chicken. Fresh vegetables and healthy fats, such as avocado, can make your sandwiches even more satisfying.
The best part is that healthy eating does not mean giving up the simple pleasures of food. A warm slice of homemade bread, prepared with care and enjoyed in sensible portions, is a delicious way to bring comfort, nourishment, and homemade goodness to your table.