

This is the only Soft & Chewy Oatmeal Raisin Cookie recipe you’ll ever need! Discover the secrets to thick, bakery-style cookies that stay moist for days with perfectly spiced flavor and plump, juicy raisins. An easy, one-bowl family favorite!
Close your eyes and think of the most comforting cookie imaginable. It’s not overly fancy, but it’s deeply satisfying. It has a craggy, golden-brown exterior that gives way to a center that’s dense, chewy, and soft—almost like a baked hug. It’s fragrant with the warmth of cinnamon, studded with sweet, plump raisins, and has the hearty, wholesome backdrop of oats. This is the ideal Oatmeal Raisin Cookie, a treat that feels like home in every single bite.
Yet, too often, oatmeal raisin cookies are relegated to the status of a “healthier” afterthought—dry, cakey, or thin and crispy. They deserve so much more. A truly great oatmeal raisin cookie should be a destination, not a compromise. It should be the cookie people fight over in the cookie jar, the one that evokes nostalgic sighs, and the one that proves simple ingredients can create pure magic.
This recipe is the culmination of that quest. We’re not just making cookies; we’re engineering softness and chew. Through precise ratios, a crucial chilling step, and a few baker’s secrets, we create a cookie that is thick, bakery-style, and maintains its perfectly soft texture for days. It’s an easy, forgiving recipe that’s perfect for beginner bakers and a rewarding staple for seasoned pros. Let’s bake the ultimate version of a beloved classic.
Why This Recipe Makes the Best Oatmeal Raisin Cookies
Before we cream the butter, let’s unpack why this method consistently delivers cookie jar perfection:
· Guaranteed Soft & Chewy Texture: The combination of more brown sugar, an extra egg yolk, and a secret ingredient (cornstarch!) ensures a tender, moist crumb that stays soft long after baking.
· Thick, Bakery-Style Shape: A mandatory dough-chilling period prevents over-spreading, giving you those coveted thick, puffy cookies with a slightly crisp edge and a gooey center.
· Deep, Balanced Flavor: We’re not shy with the cinnamon, and a hint of nutmeg and vanilla creates a warm, complex spice profile that complements—never overwhelms—the oats and raisins.
· Plump, Juicy Raisins Every Time: The simple trick of soaking the raisins transforms them from dry, chewy nuggets into bursts of jammy sweetness.
· Make-Ahead Dough: The dough balls freeze beautifully, allowing you to bake fresh, warm cookies on demand for impromptu guests or weeknight treats.
Ingredients for the Perfect Cookie Texture & Flavor
Here’s your shopping list for cookies that are anything but ordinary. Quality matters.
The Dry Ingredients:
· 1 ½ cups (190g) all-purpose flour, spooned and leveled
· 1 teaspoon cornstarch (the secret for softness!)
· 1 teaspoon baking soda
· 1 teaspoon ground cinnamon
· ½ teaspoon ground nutmeg or allspice (optional but recommended)
· ½ teaspoon salt
The Wet Ingredients:
· 1 cup (2 sticks / 226g) unsalted butter, softened to room temperature
· 1 cup (200g) packed light brown sugar (dark brown sugar for a deeper molasses note)
· ¼ cup (50g) granulated sugar
· 2 large eggs, at room temperature (1 whole egg + 1 extra egg yolk for extra chew)
· 1 tablespoon pure vanilla extract
The Heart of the Cookie:
· 3 cups (270g) old-fashioned rolled oats (do not use quick oats or instant)
· 1 ½ cups (225g) raisins (dark, golden, or a mix)
Pro-Tip Ingredient Notes:
· Oats are Crucial: Old-fashioned rolled oats provide the perfect chewy texture and oat flavor. Quick oats will make the cookies mushy, and steel-cut will be too hard.
· Brown Sugar Dominance: Using more brown sugar than white is key for moisture and chew. The molasses in brown sugar also adds wonderful depth.
· Room Temperature Butter & Eggs: This is non-negotiable for proper creaming and emulsion, which directly impacts texture. Cold ingredients = flat, greasy cookies.
· Cornstarch: This is the stealth ingredient! It tenderizes the gluten in the flour, giving the cookies a softer, more velvety crumb.
Step-by-Step Instructions for Foolproof Cookies
Follow these steps in order for cookies that look and taste professional.
Step 1: Plump the Raisins (The First Secret)
Place the raisins in a heatproof bowl. Cover with very hot water (or hot tea, like chamomile, for extra flavor). Let them soak for 10-15 minutes until plump. Drain thoroughly and pat very dry with paper towels. This prevents soggy dough and ensures juicy raisins.
Step 2: Whisk the Dry Ingredients
In a medium bowl, whisk together the flour, cornstarch, baking soda, cinnamon, nutmeg, and salt. Set aside.
Step 3: Cream the Butter & Sugars (The Foundation)
In a large bowl using a hand mixer or stand mixer with the paddle attachment, beat the softened butter on medium speed for 1 minute until smooth.
Add both sugars. Beat on medium-high speed for 2-3 full minutes, until the mixture is very light, fluffy, and pale in color. Scrape down the bowl. This step incorporates air, which contributes to the perfect texture.
Step 4: Incorporate Eggs & Vanilla
Add the whole egg and mix on medium until fully combined. Add the extra egg yolk and vanilla extract, and mix again until smooth. The mixture may look slightly curdled—this is fine.
Step 5: Combine Dry & Wet Ingredients
With the mixer on low, gradually add the dry ingredient mixture. Mix just until no flour streaks remain. Do not overmix.
Using a sturdy spatula, fold in the old-fashioned oats and the dried, plumped raisins until evenly distributed. The dough will be thick and sticky.
Step 6: The Mandatory Chill (The Second Secret)
Cover the bowl tightly with plastic wrap and refrigerate for at least 1 hour, or up to 72 hours. This step cannot be skipped. Chilling solidifies the butter, preventing cookie spread, and allows the oats to hydrate, leading to a chewier texture.
Pro-Tip: For best flavor and texture, chill the dough overnight (24 hours).
Step 7: Scoop, Shape, and Final Chill
Preheat oven to 350°F (175°C). Line baking sheets with parchment paper.
Using a standard #20 cookie scoop or 3 tablespoons of dough, portion the dough. Roll each portion into a tall, rough ball (don’t flatten it).
Place dough balls at least 3 inches apart on the baking sheets. For extra-thick cookies, you can chill the shaped balls on the sheet for an additional 15 minutes before baking.
Step 8: Bake to Perfection
Bake one sheet at a time in the center of the oven for 11-13 minutes.
The cookies are done when the edges are set and lightly golden, but the centers still look soft, puffy, and slightly underdone. They will not look fully set.
Do not overbake. They will continue to cook and set on the hot baking sheet.
Step 9: The Critical Cool Down
Remove the baking sheet from the oven. Let the cookies cool on the hot baking sheet for 5 full minutes. This allows them to finish setting without becoming hard.
After 5 minutes, carefully transfer the cookies to a wire rack to cool completely. This stops the cooking process and ensures the perfect soft-chewy texture.
Expert Tips for Cookie Baking Mastery
· Weigh Your Flour: The most common baking mistake is measuring flour incorrectly. For guaranteed results, use a kitchen scale. If measuring by volume, fluff the flour, spoon it into your cup, and level it off—never scoop.
· Underbake Slightly: Take them out when they look almost underdone. They will set up perfectly as they cool.
· One Sheet at a Time: Baking multiple sheets disrupts airflow and leads to uneven baking. Patience yields perfect cookies.
· Cool Your Baking Sheets: Always let your baking sheets cool to room temperature between batches. Placing dough on a hot sheet will cause premature spreading.
· The Freezer Trick: Portion and roll the dough balls, then freeze them solid on a baking sheet. Transfer to a freezer bag. Bake frozen, adding 1-2 minutes to the bake time, for fresh cookies anytime.
Delicious Variations to Try
· Oatmeal Chocolate Chip: Replace raisins with 1 ½ cups of semi-sweet chocolate chips.
· Cranberry Walnut Oatmeal: Use dried cranberries instead of raisins and fold in 1 cup of chopped toasted walnuts.
· Monster Cookies: Add ½ cup each of chocolate chips, M&M’s, and chopped peanuts to the dough.
· Gluten-Free: Use a 1:1 gluten-free all-purpose flour blend.
· Brown Butter Oatmeal Raisin: Brown the butter before creaming for a deep, nutty flavor. Let it resolidify to room temperature before using.
Frequently Asked Questions (FAQ)
Why are my cookies flat and thin?
The usual culprits:Butter was too warm/melted, dough wasn’t chilled, baking sheet was warm, or there’s too little flour (often from improper measuring).
Can I use quick oats?
It’s strongly discouraged.Quick oats are cut finer and absorb moisture differently, resulting in a mushier, cakier, and less textured cookie. Old-fashioned oats are essential for the right chew.
How do I keep my cookies soft for days?
The cornstarch and brown sugar help immensely.For storage, place completely cooled cookies in an airtight container with a single piece of bread. The cookies will absorb moisture from the bread, staying soft for up to 5 days.
Can I freeze the baked cookies?
Yes.Let them cool completely, then store in a freezer-safe bag or container for up to 3 months. Thaw at room temperature.
My raisins sunk to the bottom. How do I prevent that?
Ensure your raisins are thoroughly dried after plumping.Also, tossing them in a tablespoon of the measured flour before folding them in can help them stay suspended in the dough.
This recipe for Soft & Chewy Oatmeal Raisin Cookies is more than a list of ingredients; it’s a blueprint for comfort. It’s a reminder that the simplest pleasures are often the best, and that with a little care, you can elevate a humble classic into something extraordinary.
It’s the cookie you bake for a friend in need, for a housewarming gift, or for a quiet Sunday afternoon with a book. It’s a timeless treat that never goes out of style, and now, you hold the secret to making it perfectly, every single time.
Now, I’d love to hear from you! Did you try the brown butter variation? Add walnuts? How did your family react to the ultimate chewy texture? Share your cookie stories and photos in the comments below!
Craving more classic cookies? You have to try my Perfect Chocolate Chip Cookies or Chewy Ginger Molasses Cookies next!
More Recipes You Might Like
-

Meatloaf With A Tomato Beef Sauce
Introduction Meatloaf With A Tomato Beef Sauce is a timeless comfort food dish known for its hearty texture, rich flavor, and satisfying homemade appeal. Combining seasoned ground beef with a savory tomato-based sauce, this classic recipe creates a tender and flavorful centerpiece perfect for family dinners, gatherings, or cozy weekend meals. The balance of juicy…
-
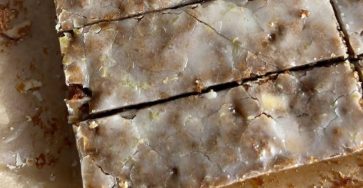
Lebkuchen Bars
Lebkuchen Bars Introduction Lebkuchen Bars are a deliciously spiced dessert inspired by traditional German gingerbread. Soft, aromatic, and rich with warm holiday flavors, these bars combine honey, cinnamon, cloves, ginger, and nuts into a tender baked treat that feels both festive and comforting. Often topped with a sweet glaze or chocolate coating, Lebkuchen Bars are…
-

Slow Cooker 4-Ingredient Pork Chops and Stuffing
Slow Cooker 4-Ingredient Pork Chops and Stuffing Introduction Slow Cooker 4-Ingredient Pork Chops and Stuffing is the ultimate comfort food meal for busy families and home cooks seeking simplicity without sacrificing flavor. This hearty dish combines tender pork chops with savory stuffing and creamy sauce, all slowly cooked to perfection in one convenient pot. The…